


Real Estate Media Planning Guide for Listings

A listing can be ready to photograph and still be unprepared to market. The difference is usually the plan behind the media: what buyers need to see first, which features deserve motion or aerial coverage, and when every asset must be delivered for launch. This real estate media planning guide helps agents and property marketers build a practical media package around the property, the audience, and the sales or leasing timeline.
Strong real estate media is not about ordering every available service for every address. It is about creating a complete presentation without slowing down the listing process or paying for assets that do not support the campaign. A well-planned shoot gives you MLS-ready images, social content, property details, and a clear release schedule from one coordinated appointment.
Start With the Listing Goal
Before booking, identify the job the media needs to do. A vacant starter home, a high-end coastal property, a retail space, and a short-term rental may all need professional photography, but they do not need the same visual strategy.
For a residential listing, the first goal is usually to earn the click and keep buyers exploring. That puts the priority on bright, accurate photography, a clear sense of flow, and enough supporting detail to answer basic questions before a showing. If the home has a strong view, unusual architecture, resort-style outdoor space, or a location advantage, video and drone coverage may help communicate what still images cannot.
For commercial properties, the plan often shifts toward access, scale, layout, parking, signage, and surrounding context. Tenants and investors need to understand how a space works, not simply whether it photographs well. Floor plans, aerial images, and a walkthrough can carry more weight than highly styled lifestyle footage.
Ask three questions before choosing services: Who is most likely to respond to this property? What is the strongest reason they will care? Where will they first encounter the listing? Those answers keep the media plan focused.
Build Your Real Estate Media Planning Guide Around Buyer Needs
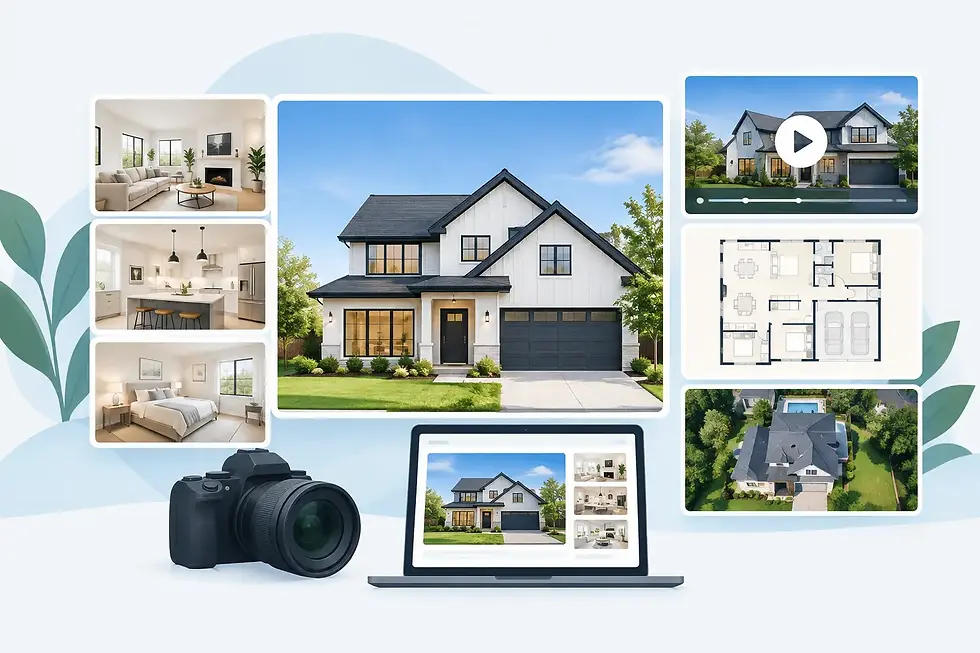
A complete listing package works best when each asset has a specific role. Photography is the foundation because it powers the MLS, portals, email, print pieces, and most property websites. Video creates pace and emotion. A 3D tour lets remote buyers or tenants explore independently. Floor plans add clarity. Drone media provides context and scale when the property or its location makes that context meaningful.
The right mix depends on what a buyer cannot easily understand from standard photos. A narrow lot with a surprisingly functional layout may benefit from a floor plan. A home with a detached guest suite, large acreage, proximity to the coast, or a corner location may benefit from aerial coverage. A remodeled home with a strong indoor-outdoor flow may be well suited to a cinematic walkthrough.
Do not treat add-ons as decoration. Choose them to reduce uncertainty. The best media answers the questions that would otherwise cause a buyer to scroll past, hesitate, or wait for an in-person visit.
Match the format to the distribution channel
MLS photos need to be clean, properly composed, and representative of the property. Social media needs a different approach. Vertical video is built for mobile viewing, where the first seconds must establish a reason to keep watching. Horizontal video remains useful for property websites, YouTube, presentations, and broader advertising placements.
Plan for both when the listing needs an active social campaign. Trying to crop a horizontal walkthrough into a vertical reel after delivery can weaken framing and cut out the features that made the shot work. Decide where the video will run before the camera arrives.
A property website gives the campaign one organized destination for photos, video, tours, floor plans, and listing details. It is especially useful when an agent is sharing the property through email, text, social posts, or broker outreach and wants a cleaner experience than a portal link alone.
Decide What Is Worth Highlighting
Every property has a lead story. It may be the kitchen renovation, usable lot size, skyline view, walkability, warehouse clearance, pool area, or flexible floor plan. Make that feature known before the shoot so it receives enough coverage rather than becoming one of many images captured on the day.
This does not mean the media should hide limitations. Accurate presentation protects the agent and sets better expectations for showings. It does mean the order and emphasis should reflect the listing's strongest marketable qualities.
A useful approach is to identify one primary selling point and two supporting points. For example, a family home might lead with the remodeled kitchen and support it with the yard and nearby school access. A commercial suite might lead with open workspace and support it with parking and street visibility. The primary point should appear early in the photo sequence and near the beginning of the video.
If the property has a feature that changes throughout the day, schedule accordingly. West-facing views, pools, illuminated landscaping, and city lights may justify twilight coverage. The trade-off is timing and weather sensitivity, so reserve it for listings where the result adds real campaign value.
Prepare the Property for the Camera
Professional production improves a listing's presentation, but it cannot replace basic property readiness. The fastest way to protect a next-morning launch is to have the home or space camera-ready before the appointment begins.
Confirm that cleaning, staging, repairs, landscaping, and access arrangements are complete. Remove personal clutter, pet items, visible cords, trash bins, vehicles that block key views, and temporary signage unless it serves the campaign. Turn on interior and exterior lights where appropriate, open blinds to show views, and secure pets.
For occupied properties, set expectations with the seller or tenant early. They should know that photography and video require rooms to stay clear while they are being captured. A walkthrough moves more efficiently when occupants have a place to wait that is outside the active shooting areas.
Use this quick pre-shoot check when the property is being prepared:
Clean all visible surfaces, glass, mirrors, and appliances.
Clear counters, bathroom vanities, refrigerator fronts, and floors.
Finish yard work and move bins, hoses, toys, and parked cars.
Confirm gate codes, lockbox access, parking instructions, and any building requirements.
For multifamily, commercial, or tenant-occupied locations, verify any rules around filming common areas, drone use, loading access, and visitor check-in before the appointment. Operational details can affect the schedule more than the actual shoot.
Schedule Media Backward From Launch Day
The media plan should begin with the desired go-live date, not the shoot date. If a listing needs to appear on Thursday morning, work backward from the time copy, disclosures, MLS fields, approval, and marketing materials need to be complete.
Next-morning photo delivery can shorten the gap between production and launch, but agents still need time to review assets, select a lead image, build the listing, and prepare outreach. Video, 3D tours, and drone work may have different production timing depending on the package and conditions. Confirm deliverables and turnaround before scheduling a public launch around them.
Weather also matters. Aerial work depends on safe conditions and applicable airspace requirements. Exterior-heavy listings can look materially different under gray skies, high winds, or harsh midday light. In Southern California, bright weather is common, but marine layer conditions and wind can still affect the look and schedule of a shoot.
Build a small buffer when the launch is tied to an open house, broker preview, advertising start date, or owner deadline. The point is not to delay marketing. It is to avoid rushing a listing live with incomplete assets that would have taken little planning to coordinate.
Keep the Approval Process Simple
Too many reviewers can slow a listing down, especially when feedback arrives in fragments. Assign one decision-maker for media approval whenever possible. That person should review the gallery for factual issues, confirm that the primary selling points are represented, and select the image that will lead the listing.
Keep revision requests specific. A clear request such as "replace the front exterior with the wider angle" is easier to act on than general feedback about making the property feel more appealing. If a room was not ready or a key feature was unavailable during the appointment, address that quickly while rescheduling is still practical.
Consistency also matters for teams and brokerages. Using a reliable media partner and a repeatable package structure makes it easier to set expectations with agents, sellers, and marketing staff. The workflow becomes familiar: book, prepare, shoot, review, publish.
Measure Whether the Plan Is Working
A media package should support business results, not just a polished gallery. After launch, watch the signals that match the property's campaign: online saves, showing requests, video views, time spent on the property website, inquiry quality, and leasing or buyer feedback.
These signals will not identify one perfect service for every listing. A 3D tour may be especially valuable for an out-of-area buyer pool, while drone imagery may matter more for a large parcel or a location-led property. Use the results to refine future bookings instead of applying the same package by habit.
The most effective plan is the one that makes the property easier to understand and faster to market. When the media, distribution, and launch timeline are decided before the appointment, your listing can go live with fewer loose ends and a much stronger first impression.


Comments